
Ombre Nails: A Soft Gradient Look
Ombre nails have gained significant popularity in recent years, offering a visually appealing and stylish gradient effect. The term "ombre" comes from French, meaning "shaded" or "shadowed." In nail art, it involves blending two or more colors seamlessly to create a transition from light to dark or between contrasting hues. This technique is versatile, allowing for various color combinations and styles.
The Rise of Ombre Nails
The concept of ombre originally appeared in the fashion industry, notably in hair coloring, before transitioning into nail art. Nail technicians and enthusiasts quickly embraced this gradient look due to its unique aesthetic and customization possibilities. Ombre nails have since become a staple in both casual and high-fashion settings.
Why Are Ombre Nails So Popular?
Ombre nails offer a chic and effortless way to elevate a manicure. Their popularity is driven by the blend of creativity and elegance, allowing individuals to express their style through subtle or bold transitions. Additionally, ombre nails are suitable for any season, with lighter shades for summer and deeper tones for winter.
Popular Ombre Styles
Ombre nails can be achieved through various techniques and styles, each offering a distinct look. Below are some of the most popular ombre nail styles:
1. Classic Two-Color Ombre
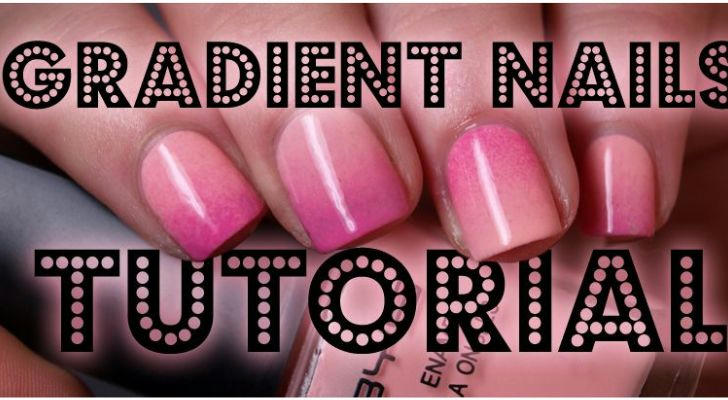
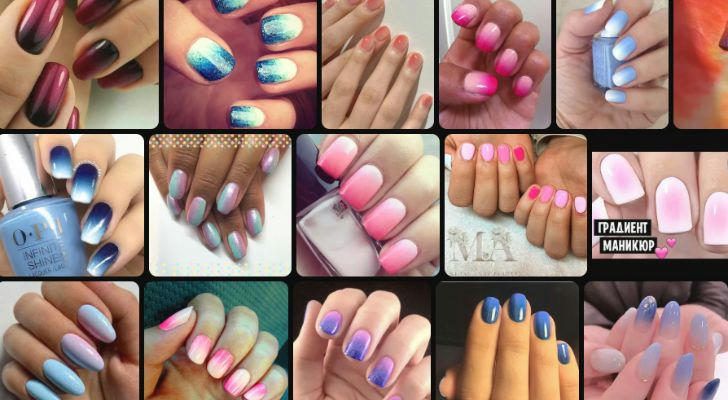
This basic ombre style blends two complementary or contrasting colors. Common combinations include nude to pink, blue to white, and black to red. The transition can be smooth or more defined, depending on the desired effect.
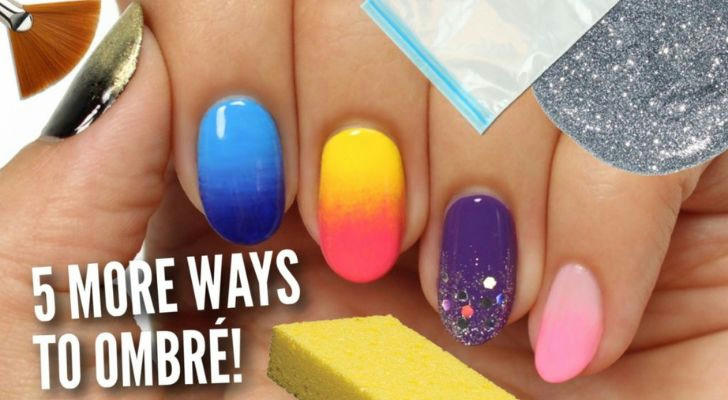
2. Glitter Ombre
Adding glitter to ombre nails enhances the design, creating a sparkling gradient. This style often involves fading glitter from the tip to the base or vice versa. It is particularly popular for festive occasions or adding a touch of glamor.
3. Reverse Ombre
Unlike the traditional ombre, the darker color starts at the base and fades towards the tip. This reverse effect offers a unique twist, often using bold colors like burgundy or navy transitioning into lighter shades.
4. Multicolor Ombre
This artistic variation incorporates more than two colors, blending them harmoniously across the nail. Rainbow ombre and sunset ombre are popular choices, creating a vibrant and eye-catching look.
5. French Ombre (Baby Boomer Nails)
This subtle and elegant style blends a soft pink or nude base into white tips, resembling a classic French manicure but with a gradient effect. It’s ideal for weddings and formal events.
How to Create Ombre Nails at Home
Achieving ombre nails at home requires some basic tools and a bit of practice. Here’s a step-by-step guide:
Tools Needed:
- Two or more nail polish colors
- A makeup sponge
- A base coat and top coat
- Nail polish remover
- Cotton swabs
Steps:
- Apply a base coat to protect your nails.
- Paint the lighter color onto the sponge, followed by the darker color, slightly overlapping.
- Dab the sponge onto the nail, gently blending the colors.
- Repeat until the desired opacity is achieved.
- Clean up excess polish around the nails using a cotton swab dipped in remover.
- Seal the design with a top coat to ensure longevity.
Professional Techniques for Ombre Nails
Salons often use advanced methods for flawless ombre effects:
Airbrushing
A specialized tool sprays a fine mist of color, creating a smooth gradient without harsh lines. This method is ideal for achieving a delicate fade.
Dip Powder Ombre
Using colored dipping powders, technicians gradually blend shades, resulting in a durable and vibrant ombre design.
Gel Ombre
Gel polish is layered and blended directly on the nail, followed by curing under a UV lamp. This method allows for intricate transitions and lasting results.
Maintaining Ombre Nails
Proper maintenance ensures the ombre effect remains vibrant:
- Apply a clear top coat every few days to protect against chipping.
- Moisturize nails and cuticles regularly to prevent dryness.
- Use non-acetone polish remover to minimize fading.
Common Mistakes to Avoid
When attempting ombre nails, some common errors can affect the outcome:
- Uneven Blending: Using a dry sponge or improper dabbing can create streaks.
- Poor Color Selection: Choosing shades that clash or do not blend well can result in an unappealing look.
- Skipping the Top Coat: Without sealing, the gradient may wear off quickly.
Color Combinations to Try
Experimenting with different shades can make ombre nails truly unique. Here are some popular combinations:
- Pastel Pink to Lavender: Soft and feminine
- Black to Gray: Bold and edgy
- Coral to Peach: Summery and bright
- Mint to Aqua: Cool and refreshing
Final Thoughts
Ombre nails continue to be a favorite among nail enthusiasts for their elegant yet creative appeal. Whether done at home or in a salon, mastering this technique opens up endless possibilities for nail art expression. Embracing various colors, textures, and finishes allows for personalization, making ombre nails a lasting trend.
References
- NailPro Magazine: The Rise of Ombre Nails in Fashion. Retrieved from
- StyleCraze: How to Achieve Ombre Nails at Home. Retrieved from