
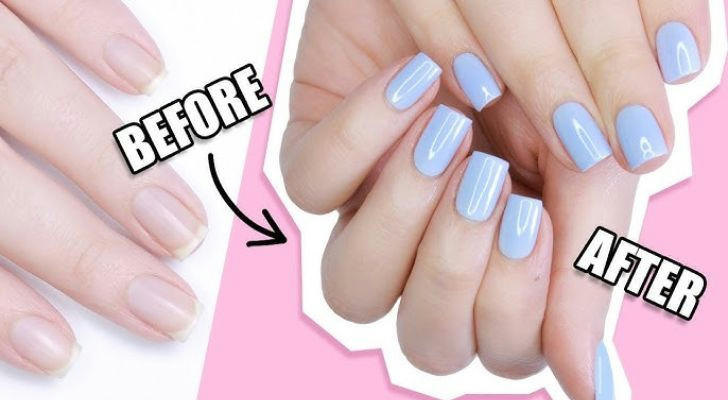
A Step-by-Step Guide to Applying Nail Polish
Nail polish is more than just a cosmetic touch—it’s a small but powerful part of self-expression. Whether going for a natural look or something bold and artistic, applying nail polish correctly makes a difference in how long it lasts and how smooth it looks. This step-by-step guide outlines a practical and accurate process for applying nail polish at home, using methods that are backed by professional practices and dermatology recommendations.

Why Proper Application Matters
Proper application of nail polish helps reduce chipping, extend wear time, and maintain healthy nails. According to the American Academy of Dermatology (AAD), improper techniques—like skipping base coats or using old polish—can contribute to nail damage and uneven results.
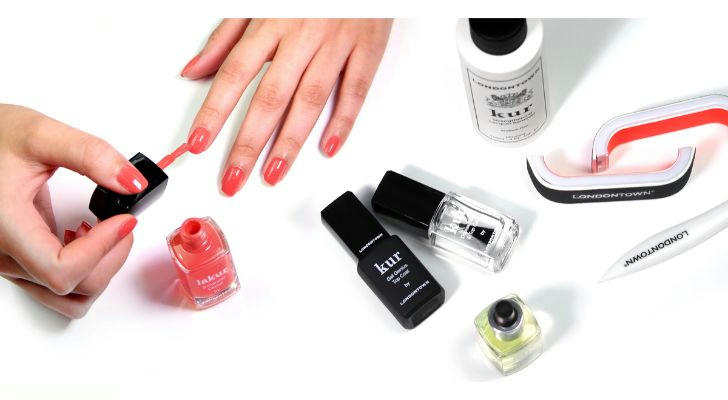
What You'll Need
Before starting, having the right tools can make the process easier and more effective. These are the common items used:
- Nail polish remover (non-acetone is gentler on nails)
- Cotton pads or lint-free wipes
- Nail clipper and nail file
- Cuticle pusher
- Buffer block
- Base coat
- Nail polish of choice
- Top coat
- Quick-dry spray or drops (optional)
- Clean-up brush or cotton swab
Step 1: Remove Old Nail Polish
Begin with clean nails. Use a nail polish remover to eliminate any old color or residue. Avoid scrubbing harshly. Instead, press the remover-soaked cotton on the nail for a few seconds, then wipe gently. This technique helps lift polish more efficiently without damaging the nail surface.
Step 2: Trim and File Nails
Shape nails using a nail clipper and file. File in one direction rather than a back-and-forth motion to avoid splitting. Oval, square, and almond shapes are popular and suitable for most hand types. The file grit should be between 180 and 240 for natural nails.
Step 3: Gently Push Back Cuticles
Soften cuticles by soaking fingertips in warm water for a few minutes. Then, use a cuticle pusher to gently push them back. Avoid cutting cuticles, as this can increase the risk of infection, as stated by the Centers for Disease Control and Prevention (CDC).
Step 4: Buff the Nail Surface
Lightly buff the surface of each nail using a buffer block. This helps smooth out ridges and improves polish adhesion. Be careful not to over-buff, which can thin the nail plate over time.
Step 5: Clean Nails Again
After shaping and buffing, wipe nails with a cotton pad soaked in nail polish remover to eliminate dust or oils. This final cleanse ensures a smooth surface for the base coat.
Step 6: Apply a Base Coat
A base coat serves multiple functions. It protects the nail from staining, provides a smooth surface for the polish, and improves adhesion. Let the base coat dry completely before moving to the next step. Most base coats dry within 1–2 minutes.
Step 7: Apply the First Coat of Color
Shake the nail polish bottle gently before use to mix pigments evenly. Wipe one side of the brush on the bottle neck to avoid overloading. Then, start at the center of the nail near the cuticle and sweep up to the tip. Repeat on each side with minimal strokes (ideally three strokes per nail). Let this layer dry for 2 minutes before applying the next.
Step 8: Apply the Second Coat of Color
A second layer deepens the color and evens out coverage. Use the same method as the first coat. Thin layers work better than thick ones—they dry faster and are less likely to smudge.
Step 9: Apply a Top Coat
The top coat locks in the color and adds shine. It also helps prevent chipping. For longer wear, brush a little top coat along the tip edge of the nail to seal the ends. Let this layer dry for at least 5 minutes.
Step 10: Clean Up the Edges
Use a small brush dipped in nail polish remover or a cotton swab to clean around the nail edges. This step makes the manicure look polished and tidy.
Step 11: Let Nails Fully Dry
Even if nails feel dry to the touch, full hardening can take up to 20–30 minutes. To reduce smudges:
- Avoid using hands for detailed tasks
- Use a quick-dry spray or drops if desired
- Dip nails in cold water after 5 minutes to help set the polish (optional)
Extra Tips for Better Results
- Avoid heat and steam for at least an hour after applying polish. Heat can cause bubbling or dents.
- Store polish bottles upright in a cool, dry place. This keeps the consistency stable.
- Replace old polish every 12–24 months. Thick, stringy polish is harder to apply evenly.
- Hydrate nails and cuticles regularly with oil or hand cream.
How Long Does Nail Polish Last?
With proper application, most nail polishes last 5 to 7 days before noticeable chipping. Gel-like top coats may extend wear time slightly. Handwashing habits, product quality, and nail condition can all affect longevity.
What If the Polish Bubbles or Peels?
Common causes of bubbling include shaking the polish bottle too hard, applying thick coats, or painting over oily nails. Peeling often happens when the polish doesn't adhere properly—skipping the base coat or applying polish to wet nails may be factors.
To prevent these issues:
- Roll the bottle gently between hands instead of shaking
- Allow each layer to dry before adding another
- Apply thin, even coats
When to Give Nails a Break
Nail health can benefit from occasional breaks between manicures. According to the Cleveland Clinic, leaving nails bare for a few days every couple of weeks can help prevent discoloration, dryness, and brittleness. During breaks, apply a nail strengthener or moisturizing oil.
Final Thoughts
Applying nail polish may seem simple, but small techniques make a visible difference in quality and durability. With the right preparation and care, at-home manicures can be just as satisfying as salon ones—if not more. This guide can serve as a reliable reference for anyone looking to improve their nail routine with proven, skin-safe practices.