
Beginner’s Guide to Using a Nail Drill
Electric nail drills are no longer used only in salons—they've become part of many home nail care setups as well. With the right technique and safety precautions, a nail drill can help create smoother finishes, prep nails more efficiently, and maintain enhancements like acrylics or gels. For those just getting started, understanding how to use the tool properly makes all the difference.
What Is a Nail Drill and Why Is It Used?
A nail drill—also known as an electric nail file—is a handheld device used to shape, clean, and refine both natural and artificial nails. It uses interchangeable drill bits that rotate at various speeds to gently file down nail surfaces, remove product build-up, and refine cuticle areas.
This tool is commonly seen in professional salons, but many home users have started using it for personal nail care routines, especially for maintaining acrylic, gel, or dip powder nails.
Understanding Nail Drill Parts
Before turning the device on, it’s helpful to get familiar with its components:
- Handpiece: The part held during use; it houses the motor and holds the drill bit.
- Drill Bits: Come in different materials and shapes, each designed for a specific function.
- Speed Control: Adjusts the RPM (rotations per minute), allowing for better control depending on the task.
- Forward/Reverse Switch: Changes the rotation direction for right- or left-handed use.
- Power Source: Some drills are cordless and rechargeable, while others plug into a wall outlet.
Using the right combination of speed and drill bit ensures safety and effective results, especially for beginners.
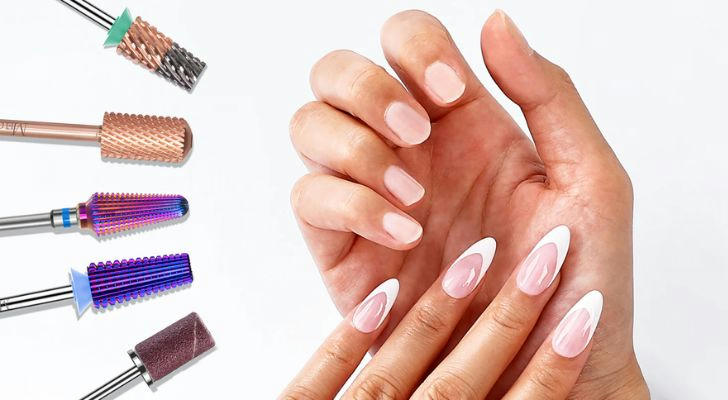
Types of Nail Drill Bits
Nail drill bits come in a range of materials and shapes. Understanding these helps in choosing the right one for each task.
By Material:
- Ceramic Bits: Gentle, heat-resistant, and ideal for beginners.
- Carbide Bits: Stronger and more aggressive, better suited for removing hard products like acrylic.
- Diamond Bits: Durable and precise, used mainly for cuticle work.
By Shape:
- Barrel Bits: Used for surface work and shortening nails.
- Cone Bits: Perfect for cleaning under the nails and sidewalls.
- Mandrel and Sanding Bands: Great for smoothing or prepping natural nails.
Choosing a fine or medium grit is generally recommended when starting out. Coarse bits should only be used after gaining experience, as they remove product quickly and may harm the nail if misused.
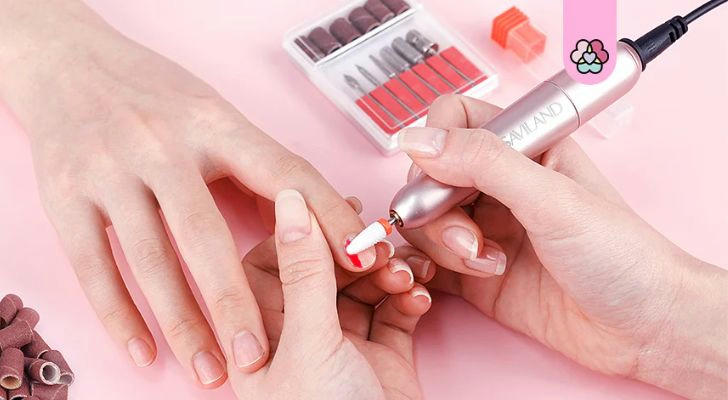
Step-by-Step: How to Use a Nail Drill Safely
A steady approach and attention to detail help reduce the risk of damaging nails or surrounding skin.
Step 1: Start with a Clean Surface
Wash hands and remove any nail product residue. If nails are coated in polish or enhancement, use acetone or appropriate remover before starting.
Step 2: Select the Correct Bit
Attach the appropriate bit depending on the task:
- Use a fine ceramic bit or sanding band to prep the nail plate.
- Choose a cone bit for cleaning around the cuticle area.
Ensure the bit is securely locked in before turning the drill on.
Step 3: Adjust Speed Settings
For natural nails and cuticle work, keep the drill at a low speed (around 5,000 to 8,000 RPM). For artificial nails or product removal, medium speeds (up to 15,000 RPM) are usually sufficient. Speeds above 20,000 RPM should only be used by trained individuals.
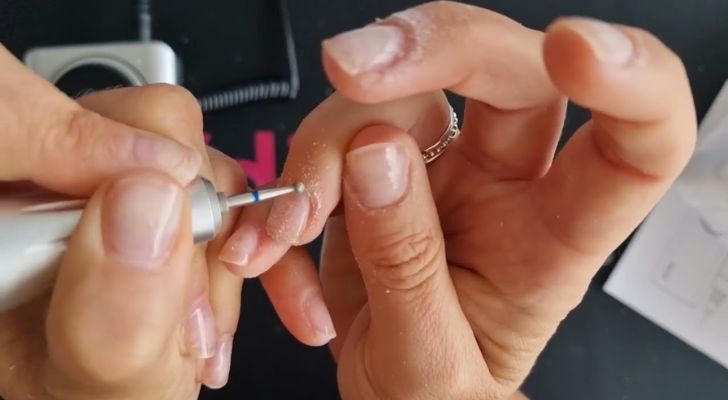
Step 4: Begin Filing with Gentle Pressure
Hold the drill like a pencil and use light, sweeping motions. Avoid keeping the bit in one place for too long, as friction can cause heat buildup or damage.
Tips:
- Always move from one side of the nail to the other.
- Let the drill do the work—no need to press down hard.
- Avoid working on wet or oily nails, as they can affect grip and control.
Step 5: Switch to Cuticle Cleaning (Optional)
Use a ball or cone-shaped bit to gently exfoliate around the cuticle line. This helps in achieving a cleaner base for polish or enhancements.
Step 6: Smooth and Finish
Use a buffer or fine sanding band to even out the surface. This step helps eliminate scratches or lines created during filing.
Common Mistakes to Avoid
Even with the right tool, misuse can cause more harm than good. Below are typical beginner errors to watch out for:
Using high speeds on natural nails
This can lead to over-filing or heat spikes.Skipping nail prep
Natural oil or residue can reduce adhesion if product is applied afterward.Holding the drill at the wrong angle
The bit should be parallel to the nail plate, not pointed down into it.Neglecting bit sanitation
Nail drill bits must be cleaned and disinfected after every use to prevent infection.
Cleaning and Maintenance
Sanitizing the drill and its bits ensures hygiene and extends the life of the tool. Follow these steps:
- Remove the bit from the handpiece.
- Clean debris with a stiff brush.
- Soak in disinfectant solution (as per manufacturer’s instructions).
- Dry completely before storage.
Avoid immersing the handpiece in water. Instead, wipe it down with a damp cloth.
Is It Safe to Use a Nail Drill at Home?
When used responsibly, a nail drill can be a safe addition to a home manicure routine. However, beginners should spend time practicing on artificial nails before working on natural nails. According to the American Academy of Dermatology, over-filing and improper tool use are common causes of nail thinning or infection (source).
Those with sensitive skin or thin nail beds should start with manual files or seek professional guidance before using electric tools.
When to Avoid Using a Nail Drill
There are certain cases where using a drill is not recommended:
In the presence of nail infections
Signs like redness, swelling, or pus warrant medical attention.If nails are weak or peeling
Filing can make the issue worse.During pregnancy or if allergic to dust
Fine nail dust may irritate respiratory conditions. Always use a dust collector or face mask if this is a concern.
Tips for Better Results
- Use a dust collector or mask to avoid breathing in fine particles.
- Work in a well-lit area to maintain precision.
- Take regular breaks to avoid over-filing.
- Practice on plastic or practice hands before working on natural nails.
Over time, technique improves, and confidence increases with each use.
Final Thoughts
Using a nail drill can improve the speed and quality of at-home manicures when done correctly. By understanding the tools, maintaining safety, and practicing regularly, even beginners can achieve salon-level refinement. With care and patience, the nail drill becomes more than just a tool—it becomes a reliable part of a personal nail care routine.